Building a 3D printing workflow with GitHub Copilot
Could I use GitHub Copilot to design useful, printable 3D models, not just generate a mesh once, but build and maintain the tools and process around it?
That question grew into two connected repositories, 3D Printing and 3D Printing Models. Both have been created and maintained entirely through GitHub Copilot App sessions. That includes the Python tools, model generators, Blender workflows, viewer, tests, reusable skills, documentation, and model deliverables.
The work is not autonomous in the sense that I hand over a vague idea and accept whatever comes back. I provide the goal, measurements, photos, and corrections. Copilot helps turn that input into code, geometry, documentation, and checks. I inspect the result and decide what to change next.
This is the first article in a three-part series. Here, I want to explain how that working relationship became a maintained project rather than a collection of one-off AI experiments.
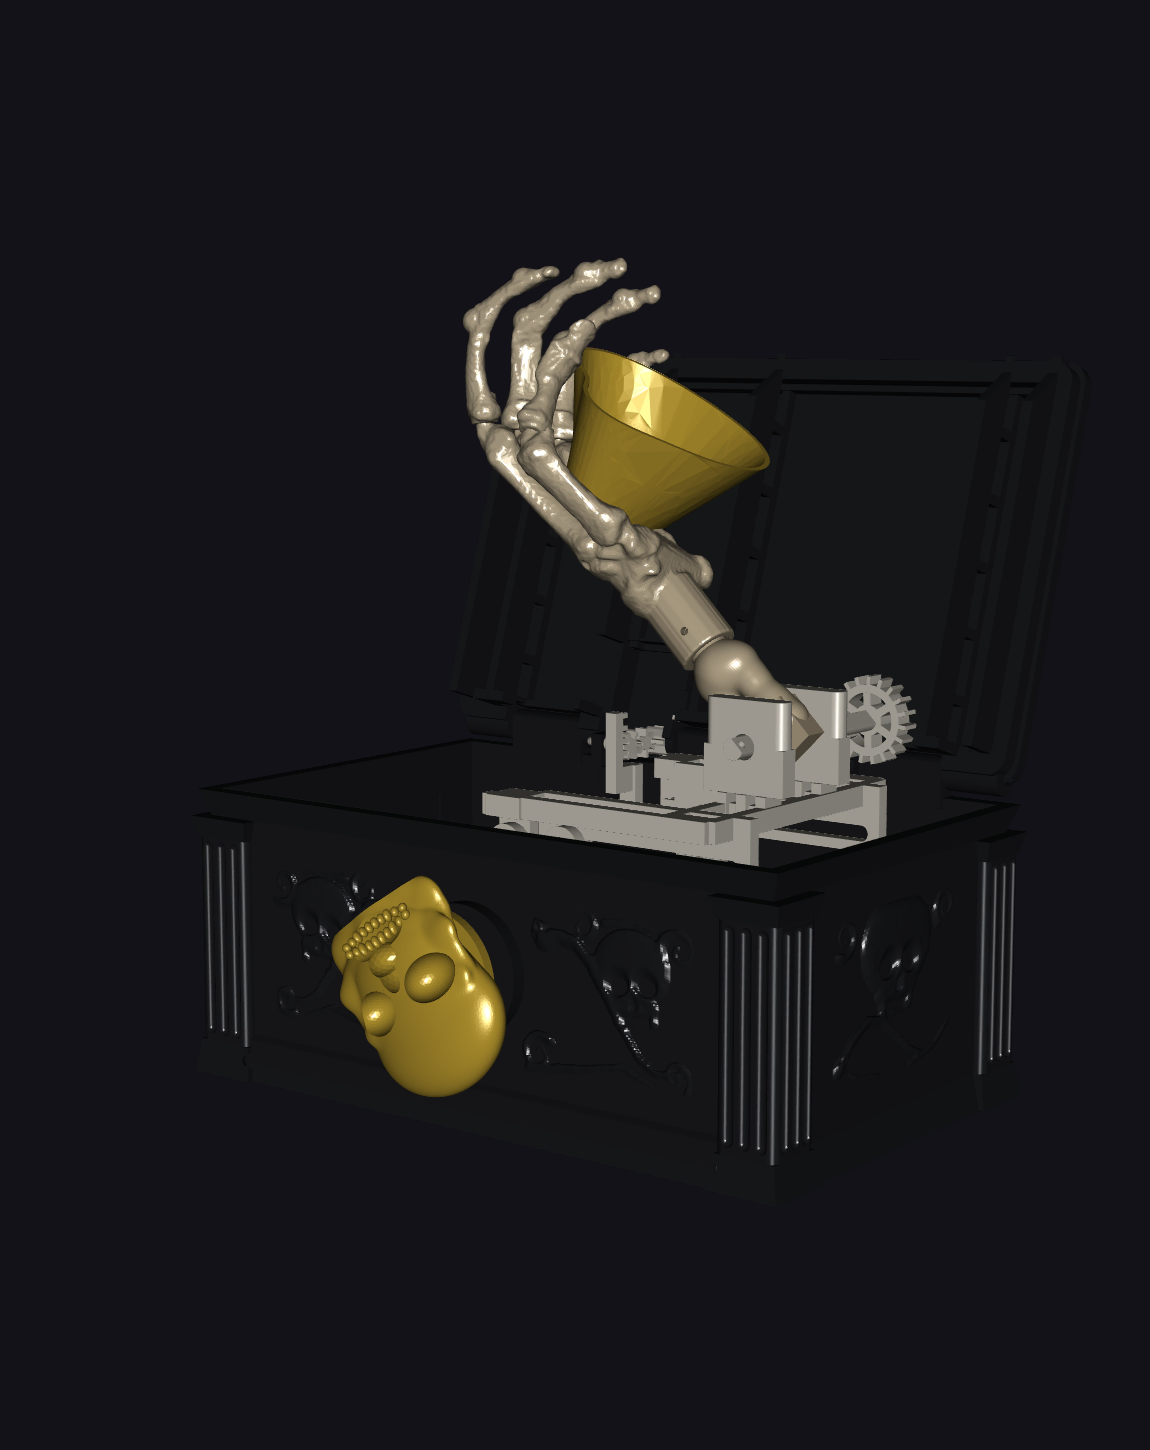
The Ghoul’s Grip combines a decorated chest, an organic hand, and a moving mechanism. It became one of the larger examples in the model catalog.
Table of contents
Open Table of contents
The GitHub Copilot App is the working environment
For me, the useful unit of work is a session around a concrete project. I describe a goal, Copilot reads the repository and its instructions, and we work on the files that implement the result. A correction can affect a Python generator, a Blender scene, a dimension record, or a print project, not just the answer in chat.
The input can be a written description, measured dimensions, photos, a video, or a combination. The output can include STL meshes, a 3MF project, construction drawings, assembly instructions, and validation reports. The important part is keeping those outputs connected to their sources and decisions.
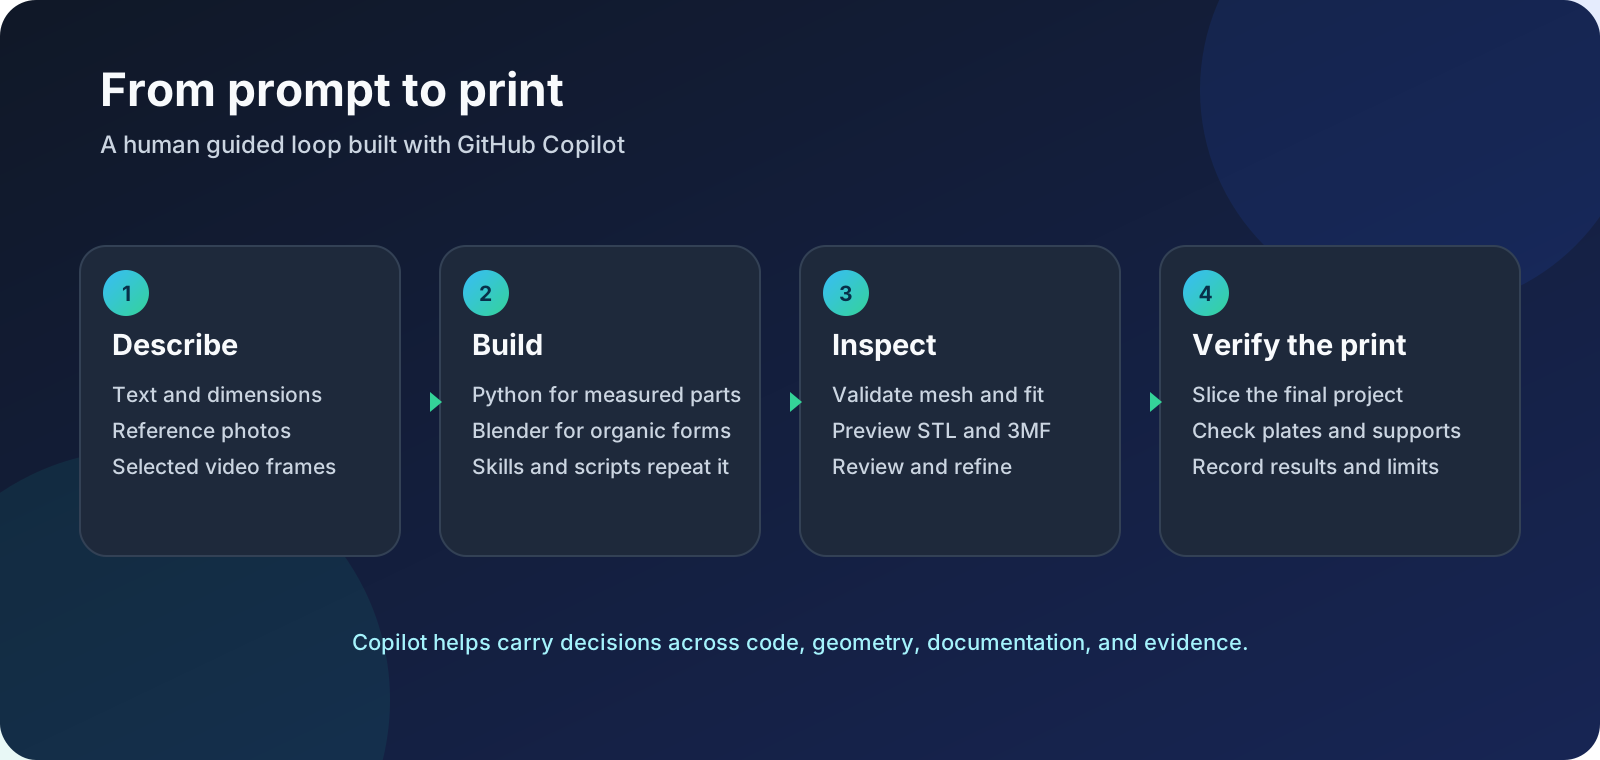
The GitHub Copilot App connects the steps, but each step answers a different question. A good-looking preview is not the same as a successful print.
The STL Canvas extension gives me a way to inspect STL and 3MF files inside the GitHub Copilot App or VS Code. Instead of describing an imagined result, I can point to the model that was actually generated and ask for a specific correction. The same loop applies to renders, drawings, and slicer evidence.
That is also why I do not describe the projects as one-prompt creations. Copilot carries out substantial implementation work, but I still supply requirements and review the result. Some decisions only become clear after holding a printed part or comparing it with the real object.
Two repositories, one modeling system
The engine repository contains reusable mesh tools, printer-specific guidance, modeling skills, the STL Canvas extension, and a web viewer. The model catalog contains individual generators, measurements, source assets, license notes, Blender files, STL and 3MF outputs, previews, tests, and model-specific audits.
This boundary came from experience. Once I had several models, the same general tools and instructions were being reused, while the actual dimensions and design evidence belonged to each model. A session in October asked how to separate the model results and descriptions from the 3D object repository engine. The repositories were split soon afterward. The engine history and catalog history record that transition.
It gives each side a clear responsibility. Improvements to a mesh validator or viewer can be made once. A model can keep its own source, history, measurements, license information, generated files, and verification evidence.
For a GitHub Copilot App session, those boundaries are practical guidance. A reusable capability belongs in the engine; a correction to one model’s measured dimensions belongs with that model. The next session can discover the current state from the repository instead of relying on my memory of an earlier conversation.
Sessions capture iteration, Git records the project
Copilot chat is where a lot of the design reasoning happens, but chat alone is not a good long-term project record. A useful cycle is to start with a task, inspect the files and references, implement one meaningful change, render or validate it, and then record what matters in the repository.
The history shows how the workflow accumulated capabilities:
| Milestone | What changed |
|---|---|
| Oct. 7 | The first committed Ghoul’s Grip mechanical box |
| Oct. 8 | A hybrid Blender and OrcaSlicer workflow was added |
| Oct. 9 | 3MF print metadata was surfaced in the Canvas |
| Oct. 11 | Measured print orientations reduced support by 61 percent |
| Oct. 20 | The reusable engine was separated from the model catalog |
Those commits tell a different story than a folder of final meshes. They show decisions, corrections, and infrastructure emerging from real work. The sessions help recover why a change was requested. The Git history shows what changed. The checked-in docs and tests keep the current decision available to the next session.
Turn repeated work into skills, scripts, and documentation
Long prompts alone do not make a workflow reliable. The repositories now include layers of reusable guidance and repeatable checks:
| Resource | Purpose and example |
|---|---|
| Instruction files | The engine and catalog guides set ownership, repository boundaries, and project rules |
| Skills | The skills library includes procedures for Blender modeling, mesh validation, and OrcaSlicer checks |
| Python scripts | Tools such as mesh_tool.py generate, transform, inspect, and render models |
| Tests and audits | Geometry tests and model-specific checks catch regressions and mechanical problems |
| Documentation | The Ghoul’s Grip print validation report records the print configuration, results, and limitations |
Each layer has a different job. Instructions define what must remain true. Skills describe how to approach a recurring task. Scripts make deterministic operations repeatable. Tests check that behavior has not regressed. Documentation preserves measurements, decisions, licensing, assembly steps, and known limitations.
For example, the Blender skill says that fit-critical geometry belongs in Python and that Blender should be used for the organic region. It also calls for scale checks and exported-mesh validation. The OrcaSlicer skill describes the final slice gate, what evidence to record, and why missing slice results must not be presented as print-ready proof.
Some of my earliest experiments concerned transparent PLA. For the player board of Terraforming Mars, I wanted a transparent surface and used AI to help explore how to print the material more clearly. The useful outcome went beyond advice in a chat: the learning became reusable skills for later attempts. Material experiments gained a place alongside modeling and print validation.
When an iteration reveals a collision, a bad fit, or a fragile manual step, Copilot can help update the generator, test, skill, or documentation as well as the geometry. A later GitHub Copilot App session can use those committed changes rather than reconstructing the decisions from a long chat.
Choosing the right Copilot model
My model choices changed as the projects grew. I started in Auto mode. For this work, I then found Gemini Argon gave me better results at a lower cost. After experimenting with Hydra-Fusion, I moved to Copilot Fusion, which I am very happy with.
That is my experience, not a general benchmark. The work involves much more than generating a mesh. Copilot needs to read a repository, follow its instructions, update code and documentation, use tools, inspect results, respond to corrections, and preserve useful knowledge between sessions. For me, the best fit has been the one that makes this whole loop productive.
Changing the model did not remove the need for a clear brief or a reviewable result. The reusable process matters because it gives each session constraints and evidence to work with, regardless of which model I select.
From a prompt to a maintained project
The biggest change was not that Copilot could create a 3D shape. It was being able to build a repeatable, documented process around the shape: reusable tools in one repository, model-specific sources and evidence in another, and previews and checks that make results easier to inspect.
I still define what the model must do, provide measurements and references, review each iteration, and decide whether the evidence is sufficient. GitHub Copilot helps carry those decisions into code, geometry, documentation, and verification. That is how a sequence of 3D printing experiments became two projects I can keep extending.
The series continues
A second article will follow on 3D modeling with the GitHub Copilot App.